
Blog
Fiber Cement Board Horizontal or Vertical Installation: How to Choose the Layout
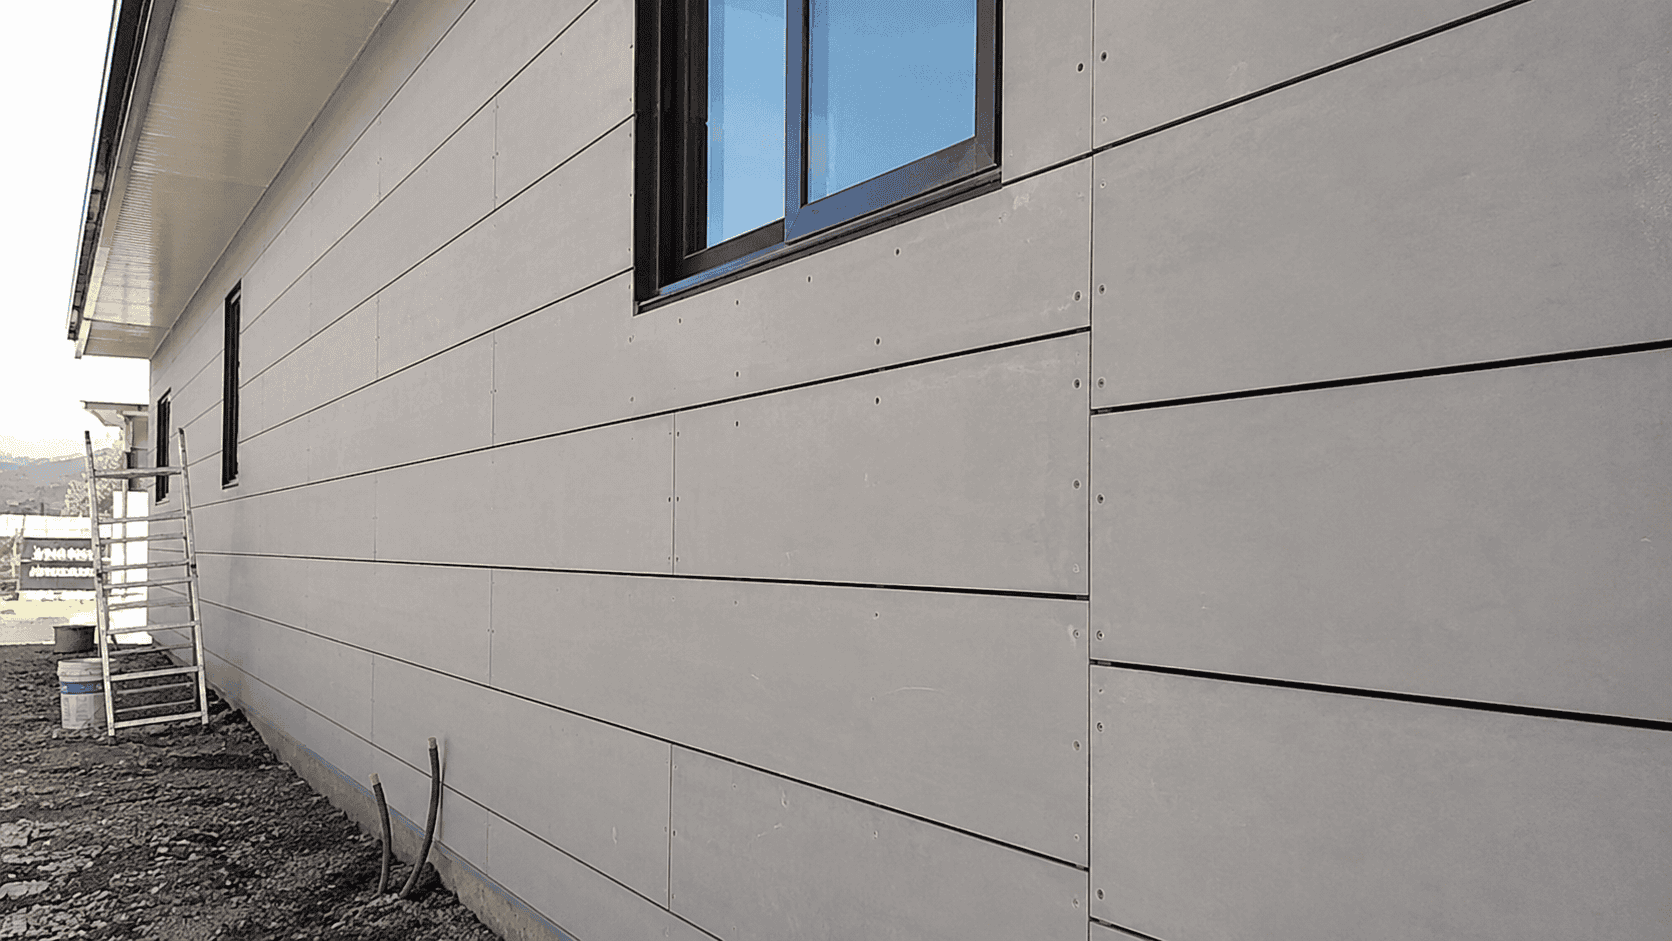
Fiber cement boards can often be installed in either a horizontal or vertical layout, depending on the wall system, board size, support frame, fixing method, and final finish.
At first, the direction may look like a simple design choice. In reality, it affects board support, joint positions, cutting waste, screw fixing, movement, water management, and the final appearance of the wall or façade.
A good layout makes the installation easier, cleaner, and more reliable. A poor layout can create narrow board strips, unsupported edges, visible joint problems, extra waste, and a higher risk of cracking.
This guide explains how to choose between horizontal and vertical fiber cement board installation in a practical way. It is written for contractors, installers, architects, developers, and specifiers who want a clear and dependable board layout before installation starts.
Why Board Layout Matters
Fiber cement board layout should be planned before the first board is cut.
The layout controls where board joints will appear, how the boards will be supported, where screws will be fixed, and how the final wall will look. It also affects how easily the boards can be handled on site.
A good layout helps to:
- Reduce unnecessary cutting
- Avoid weak narrow board strips
- Keep joints straight and consistent
- Improve fixing accuracy
- Support board edges correctly
- Improve the appearance of the façade
- Reduce installation mistakes
- Protect the final finish
The layout should not be decided only by habit. It should be based on the project conditions.
Horizontal or Vertical Installation: What Is the Difference?
Horizontal installation means the longer side of the board usually runs across the wall. This often creates horizontal joint lines.
Vertical installation means the longer side of the board usually runs up and down the wall. This often creates vertical joint lines.
Both layouts can be suitable when they are correctly supported and detailed. The best choice depends on the wall height, support spacing, board dimensions, openings, corner details, final finish, and architectural appearance.
There is no single answer for every project. The correct layout is the one that gives stable support, practical fixing, clean joints, and a good final result.
Start With the Support Frame
The support frame is one of the first things to check.
Fiber cement boards must be fixed to a suitable background. This may be timber battens, metal studs, steel framing, façade rails, or another approved support system.
Before choosing the board direction, check the position and spacing of the supports. The board edges should land on proper fixing points. If the support frame does not match the planned board layout, the installation may become difficult or unsafe.
Ask these questions before installation:
- Are the supports vertical, horizontal, or both?
- Will every board edge be properly supported?
- Will the board joints land on suitable fixing points?
- Is the frame straight and stable?
- Does the support spacing match the board thickness and project requirement?
- Can screws be fixed at the correct distance from the board edges?
The board layout and support frame must work together. If they do not, the layout should be adjusted before fixing begins.
When Horizontal Installation Can Work Well
Horizontal fiber cement board installation can be a good choice when the wall design, board dimensions, and support frame suit this direction.
Horizontal layouts are often used when the façade design needs long, clean lines. They can also work well when the board size reduces cutting and creates balanced joint positions across the wall.
Horizontal installation may be suitable when:
- The wall is wide and the design needs a long linear appearance
- The board length fits the wall with limited waste
- The support frame provides correct edge fixing
- Horizontal joints can be aligned neatly
- Openings can be planned without weak narrow strips
- The final finish supports this type of joint layout
Horizontal lines can make a building look wider and more structured. For modern façades, this can be visually attractive.
However, horizontal installation still needs proper joint gaps, screw fixing, edge support, and moisture detailing. The layout should never be chosen only for appearance.
When Vertical Installation Can Work Well
Vertical fiber cement board installation can be a practical option when the wall height, support system, and design language suit vertical board placement.
Vertical layouts may reduce the number of horizontal joints on taller walls. They can also help create a cleaner appearance on narrow wall areas, façade returns, stair cores, shafts, and certain external sheathing applications.
Vertical installation may be suitable when:
- The wall height matches the board length efficiently
- Vertical joints can be supported correctly
- The design needs a taller and cleaner appearance
- The board layout works better around openings
- The support frame allows correct fixing
- The final finish is compatible with vertical joints
Vertical lines can make a wall look taller and more elegant. They can also simplify the layout in some areas.
However, vertical installation must still be checked carefully. If vertical board edges do not land on proper supports, the layout may create weak joints.
Check the Board Size Before Choosing the Direction
Board dimensions have a direct effect on layout.
Before deciding between horizontal and vertical installation, compare the board size with the wall dimensions. This helps reduce waste and avoid awkward cuts.
For example, a board layout that looks good on paper may create very narrow pieces at the top, bottom, corners, or around windows. These narrow pieces can be weak and difficult to fix.
A practical layout should use the board size intelligently.
Before cutting, check:
- Wall height
- Wall width
- Board length
- Board width
- Opening positions
- Corner positions
- Joint positions
- Expected cutting waste
- Minimum practical board piece size
The best layout is usually the one that creates strong, balanced pieces with clean joint positions.
Avoid Narrow Board Strips
One of the most common layout mistakes is leaving narrow board strips at the end of a wall, below windows, above doors, or near external corners.
Narrow strips can be harder to fix, more likely to crack, and more difficult to finish neatly. They may also create a poor visual appearance.
This problem can happen in both horizontal and vertical installation.
To avoid narrow strips, plan the full wall before cutting the first board. Do not simply start from one side and deal with the final piece later.
Good planning may involve:
- Adjusting the starting point
- Centering the board layout
- Balancing cuts on both sides
- Changing board direction
- Aligning joints with openings
- Using wider pieces at corners
- Avoiding small pieces above or below openings
A slightly adjusted layout at the beginning can prevent many problems later.
Plan Joints Around Windows and Doors
Windows and doors are critical areas for board layout.
If joints are poorly placed around openings, they may create weak points, visible cracks, or difficult finishing conditions. Corners of openings are especially sensitive because they combine cutting, fixing, movement, and finishing in one area.
When planning horizontal or vertical installation, check how the board joints will meet window and door openings.
Avoid placing very weak joints directly at high-stress areas where possible. Also avoid small board pieces around window corners, door heads, and reveal areas.
A good layout around openings should:
- Keep board pieces strong
- Avoid unnecessary small cuts
- Support all board edges
- Allow proper screw positioning
- Maintain clean joint lines
- Work with trims, reveals, and finishing details
The aim is to make the opening detail look intentional, not improvised.
Think About External Corners and Returns
External corners, internal corners, and façade returns should be considered before choosing board direction.
If the layout is not planned, the final board piece near a corner may become too narrow. This can make the corner weaker and harder to finish.
For horizontal installation, check how the horizontal joints wrap or align around the corner.
For vertical installation, check whether the vertical joint position creates a narrow strip near the corner.
A good corner layout should provide:
- Strong board pieces
- Proper edge support
- Clean joint alignment
- Enough space for correct screw fixing
- Compatibility with corner trims or profiles
- A neat and balanced appearance
Corners are highly visible, so layout mistakes are easy to notice.
Consider the Final Finish
The final finish should influence the board direction.
A painted board system, rendered wall, ventilated façade, tile finish, or cladding system may each require a different approach to joints, trims, gaps, and surface preparation.
For painted fiber cement board applications, joint lines may remain visible as part of the design. In this case, the direction and alignment of boards are very important.
For rendered systems, board joints may be covered by the render system, but the background still needs to be stable and correctly detailed.
For ventilated façades, trims, profiles, ventilation gaps, and drainage zones must be considered.
For tile or decorative finishes, the board layout must work with adhesive, waterproofing, and movement requirements.
Do not choose horizontal or vertical installation before confirming the final finish. The finish and board layout should be planned together.
Consider Water Management on External Walls
For external walls and façades, water management is always important.
Fiber cement boards can be used successfully in external applications, but the wall system must be detailed correctly. Board direction may affect joint exposure, trim design, water run-off, and drainage strategy.
Horizontal joints can be more exposed to water sitting or collecting if they are poorly detailed. Vertical joints may also need careful sealing, backing, trims, or profiles depending on the system.
This does not mean one direction is always better than the other. It means the selected layout must work with the full façade design.
For external applications, check:
- Joint design
- Corner profiles
- Flashings
- Ventilation gaps
- Drainage paths
- Sealant compatibility
- Coating system
- Edge protection
- Weather exposure
The wall should be designed to manage water properly, not trap it behind or between board edges.
Check Handling and Installation Practicality
The direction of the boards also affects handling on site.
Large fiber cement boards can be heavy and must be handled carefully. The chosen layout should be practical for the installation team, especially on scaffolding, at height, or in narrow working areas.
Vertical boards may be more difficult to position in some conditions. Horizontal boards may require more alignment checks across long wall runs.
Before choosing the layout, consider:
- Number of installers available
- Board size and weight
- Access around the wall
- Scaffolding position
- Lifting method
- Cutting area
- Weather conditions
- Risk of edge damage during handling
A layout that looks simple in a drawing may be harder on site. Practical installation conditions should always be considered.
Keep Screw Fixing Consistent
Whichever direction you choose, screw fixing must remain consistent.
The screw pattern should follow the board manufacturer’s instructions and project specification. Edge distances, screw spacing, screw type, and fixing depth are all important.
Poor screw fixing can cause movement, cracking, loose boards, surface damage, or visible finishing defects.
When changing from horizontal to vertical installation, do not assume the same fixing logic automatically applies. Check the support direction and make sure every fixing point has proper backing.
Good screw fixing helps to:
- Hold boards securely
- Reduce movement
- Protect board edges
- Improve surface flatness
- Support long-term performance
- Reduce cracking risk
The layout should make correct fixing easier, not harder.
Keep Joint Lines Clean and Intentional
Joint lines are part of the final appearance.
Even when joints are filled, covered, or finished, their position still affects the quality of the work. Poorly planned joints can create a messy or unbalanced appearance.
Horizontal joints should look straight and consistent. Vertical joints should look aligned and intentional. Random joints, awkward cuts, and poorly balanced board pieces can make the installation look less professional.
Before installation, mark the planned joint lines. Step back and check the full wall, not just one board at a time.
A professional layout should look controlled, balanced, and practical.
Common Layout Mistakes to Avoid
Many fiber cement board layout problems are avoidable.
Avoid choosing the board direction without checking the support frame.
Avoid starting installation without a full wall layout plan.
Avoid narrow board strips at corners, windows, doors, or wall ends.
Avoid unsupported board edges.
Avoid placing screws too close to board edges.
Avoid ignoring the final finish when planning joints.
Avoid assuming horizontal installation is always easier.
Avoid assuming vertical installation is always cleaner.
Avoid forcing boards to fit an uneven frame.
Avoid leaving water-sensitive details unresolved on external walls.
The right layout is not only about direction. It is about support, fixing, joints, finishing, and long-term performance.
Practical Checklist Before Choosing the Layout
Before deciding on horizontal or vertical fiber cement board installation, check the full wall carefully.
First, confirm the support frame. Make sure the boards can be fixed securely in the chosen direction.
Second, check the board size against the wall dimensions. Avoid small pieces and unnecessary waste.
Third, plan the joints around openings, corners, and façade returns.
Fourth, confirm the final finish. Painted, rendered, tiled, or ventilated façade systems may need different detailing.
Fifth, check water management for external applications. Joints, trims, flashings, and drainage must work together.
Finally, check site practicality. The chosen layout should be realistic for handling, cutting, lifting, and fixing.
If the layout passes these checks, the installation will be easier and more reliable.
Final Thoughts
Fiber cement boards can be installed in horizontal or vertical layouts when the system is planned correctly.
The best direction depends on the support frame, board dimensions, joint positions, openings, corners, final finish, and site conditions. A good layout reduces waste, supports clean fixing, protects board edges, and improves the final appearance.
Horizontal installation can create long, clean lines and a strong modern look. Vertical installation can create a taller appearance and may work better on certain wall areas. Both can perform well when the details are correct.
The key is to plan before cutting.
When fiber cement board layout is planned properly, the boards become easier to install, easier to finish, and more reliable in use. A simple layout decision can make a major difference to the quality of the finished wall or façade.
Need pricing, technical documents, or loading guidance for fiber cement boards? Contact Smartcon with your required thickness, dimensions, quantity, and delivery destination. Our team will help you review the suitable options and provide practical export support from Turkey.
👉 Visit the Smartfiber Fiber Cement Board page to explore specs, sizes, and delivery options.
Authored by Smartcon Int’l. Trade & Marketing Ltd. on 02.07.2026. All rights reserved.
Façade specification
Need the right board for your façade system?
Share the façade build-up, exposure conditions, finish and documentation requirements. We can help assess the appropriate board and coordinate supply.